|
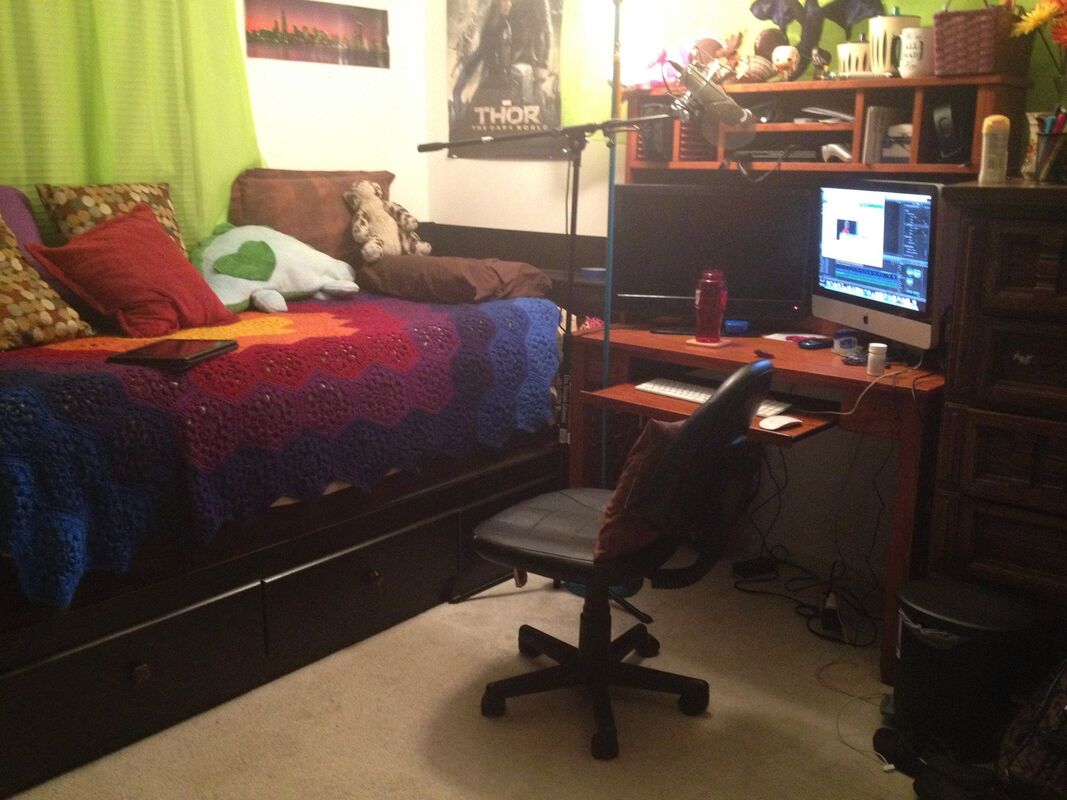
I've been voice acting professionally for the past ten years, but my experience has been less traditional compared to many of my peers. With only a few exceptions, I all but exclusively record myself from home. I buy my own equipment, record in whatever space I have access to, edit my own audio, and work directly with my clients. Recently, the need for voice actors to record not just their auditions, but a finished product from home has been growing. Newcomers or those with a more traditional background in the field are not sure where to start, and I've been asked what I've done in the past. Answering that question is a little bit easier said than done. As my career has progressed and my needs changed, I've worked with roughly 3 different individual setups that did different things for me at various milestones. Looking back, I also know that if I invested in expensive equipment early on, I wouldn't have known how to use it and may have been overwhelmed by the challenges I eventually encountered. Because of this, my recommendations tend to vary depending on where a person is in their career, their budget, and their goals. Before writing up any kind of guide, I wanted to look back at where I came from and why I made the choices I did as I progressed. By writing this out, I hope it helps to provide context as to what my home recording journey looked like and how your's may evolve over time as well, regardless of when you're stepping in. Setup #1: 2009-2014When I first started in voice over in 2009, it was a hobby and I mostly recorded for things like audio drama podcasts using my built in laptop mic. I wanted to do more, but because voiceover didn't generate any income for me at the time, my ability or desire to invest in professional recording gear was minimal. At the time most of my friends used and recommended the same USB mic, so that's where I started. Microphone: Samson C01U Interface: N/A Peripherals: On Stage Microphone Stand, MXL Pop Filter Pros: You can still get the Samson (albeit a newer model) for under $100 and it still sounds pretty good. It's clear, it generates minimal noise, and because it's not as sensitive as an XLR mic, you'll hear a bit less of the ambient noise of the room around you. If you don't have the means or ability to treat your space for recording, a USB mic may be a lot more forgiving. It's great for beginners, especially if you have no experience recording yourself and you need something to test the waters without investing a lot right away. The pictures below show what some of my recording spaces looked like during this time. I did not know how to treat my space and did nothing with it. Fortunately, I managed to get away with it!
Cons: While I was able to start my career with this mic and began booking plenty of respectable work with it, there is no mistaking that this is a starter mic. If you listen to the samples I've included below, the biggest thing to note is that compared to a broadcast quality setup, the Samson sounds thinner and there isn't a lot of low end. Because of that lack of low end, I developed a bad habit of getting way too close to the mic to get a more resonant sound and to pick up less of the room tone that was still there. While I didn't notice much extra noise if an AC unit was running in the background, I did need to turn off my refrigerator in order to record when I lived in a studio apartment. I also recommend using noise removal with this mic if possible because there still is a degree of internal noise that's going to be unavoidable with almost any USB mic. During this time I used Wavepad's built in noise removal feature at a fairly low setting, but the Waves NS1 is now my very favorite (be sure your recording software is compatible with it before consider buying a copy yourself.) Samples of Work Using this Setup:
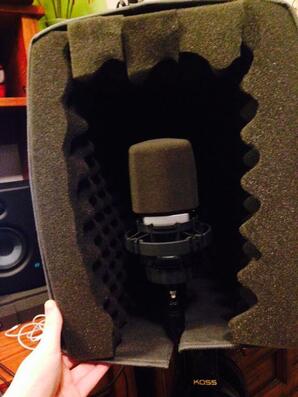
Final Thoughts: Given my circumstances, this was the perfect mic for me at the time and it did exactly what I needed it to. I was able to learn how to record myself without having to juggle a lot of equipment I didn't understand yet and it was easy to take with me as I moved constantly throughout school. Once I was ready to move on, I had a better idea of what to look for in an upgrade and how to use the tools that came with it. However, if a USB mic is the best fit for you right now, you may want to also consider the Apogee MiC PLUS if you have the budget for it. I know many professional voice actors who prefer this as a travel mic because it sounds really good, even for a USB mic, and it's pretty durable. Setup #2: 2014-2018After I graduated from college, I was booking regularly enough to know that my hobby was quickly turning into something I wanted to pursue further. I knew it was time to start investing in equipment that would allow me to do so. I took another friend's recommendation and got my first XLR mic as a graduation gift. Microphone: AKG C214 Interface: Focusrite Scarlett 2i2 Peripherals: Koss R-80 Over Ear Headphones, I continued to use the same stand and pop screen Pros: I immediately noticed a huge jump in quality from the Samson. This mic picked up much more detail from both my voice and performances, especially when it came to dynamic characters. Using an interface allowed me to directly monitor myself as I recorded and I could easily adjusted the input gain. I felt like my ability to perform increased significantly and my booking rate also grew steadily. In particular, my eLearning narration work really took off after making the switch. It was clear I had been ready to move forward and doing so paid dividends.
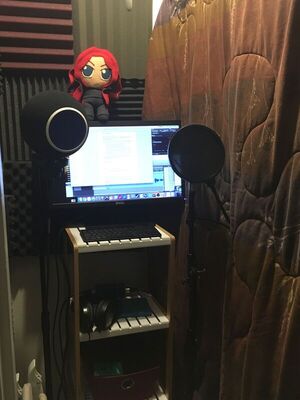
Final Thoughts: While I'm proud that did what I could with what I knew at the time, I would change several things about this setup if I was in the same situation today. The AKG is not the best mic for my voice (or many other female voices) in hindsight. The mic would not prevent me from booking, but I think masculine voices would have more luck with it in general. Additionally, I believe my closet setup did nothing to help with the low end muddiness of this mic. If I was working with this space now, I would absolutely add bass traps to the corners in order to prevent the low end from resonating even more. The Kaotica Eyeball also may have contributed to this and I should have take the mic out of it after moving to the closet. If you're at this stage and are looking at creating a closet recording space, here are a few mics for a more intermediate budget that I would recommend instead:
Setup #3: 2019-CurrentMy final and current setup is by far and above my favorite. After having the opportunity to record in a handful of studios and experimenting with every microphone I was able to get my hands on, I settled on a Neumann. Microphone: Neumann TLM 49 Interface: Steinberg UR-RT2, with a Grace M101 Preamp Peripherals: StudioBricks One Vocal Booth, On Stage Round Base Mic Stand (weighted base mic stand for additional stability.) Pros: Neumann microphones sound great on voiceover. It's pretty hard to go wrong with them, though some models may complement certain voice type better than others. I picked the TLM 49 because I had used one at one of the studios I visited and loved the way my voice sounded on it. I then found a discounted floor model for only 60% of the cost to seal the deal! Most studios that record voiceover will have at least one Neumann on hand and they tend to be a popular choice for character and game work especially. When I upgraded my microphone I also wanted to move to an interface that would provide me with a stronger preamp for the best possible sound. I stumbled upon a used Grace M101 preamp and switched to the Steinberg UR-RT2 interface because it has two passive inputs that would not pass the Grace through a built in preamp like the Scarlett would. The Grace provides a lot of gain head room and has a really clean sound that I love. The other winning half of this setup was the introduction of a vocal booth. With the closet booth I had to turn off the AC every time I needed to record because my microphone would pick up its low rumbling sound. I also had to coordinate with my roommate so that she was doing something quiet in another room, and I was out of luck if it was raining or traffic was particularly noisy. I spent so much time fighting these issues in order to record that it was clear I needed a better option. To learn more about why I chose the StudioBricks One specifically, I recommend checking out the blog entry I wrote about it! The end result was that I no longer have to worry about most noise pollution. I also feel comfortable performing as loudly as I need to without disturbing anyone who shares my space - whether screaming or singing, none of it feels off limits any more! 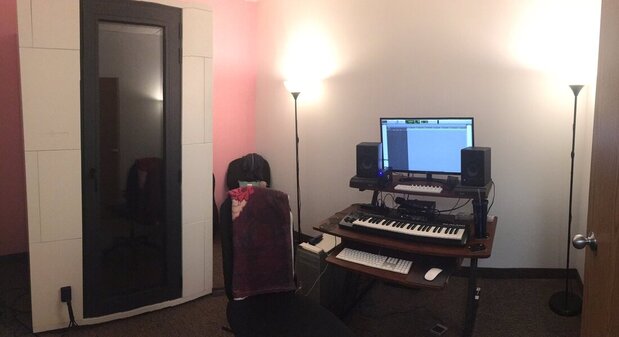 This is what my setup looks like now! Cons:
I don't have much to say about this setup that I don't like. This is my current setup for a reason! However, I would keep in mind that the Neumann TLM49 can be quite sibiliant on many female voices. I do keep a De-esser plugin on my record tracks to mitigate some of this issue personally, but I would definitely try before you buy with any Neumann you plan to invest in. If you can, get some input from any audio gear heads you know to make sure you're signing off on the best fit for you. The StudioBricks itself is a great and sturdy booth to use, but it can be challenging to move it to new locations because of the door piece (everything else is pretty manageable.) The AC unit it comes with is quiet, but not quiet enough to run while recording, so my booth does get quite steamy if I'm in the booth for more than 30-40 minutes. I just wear gym clothes if I know I'm doing long stretches at a time and drink tons of water! I still find the benefits to far outweigh these relatively minor concerns. Samples of Work Using this Setup: Final Thoughts: This setup allows me to record broadcast ready audio from my own space on my own time. It was a significant investment that took a lot of time and planning to commit to, but my booking rate skyrocketed after I made the change and I have made back my investment at least four times already in the past year and a half. I was able to confidently transition into voiceover full time and have even recorded commercial work that has gone to national broadcast from this space. For me, the biggest winner was adding a vocal booth. If you plan to work primarily or completely from home, I can vouch for it being one of the best investments I made for myself. Having a broadcast standard mic was the icing on the cake, but I desperately needed a space where I had the freedom to perform without having to constantly listen for possible noise pollution or worry that I was going to get a noise complaint. If you have the ability to make this investment (either for a premade booth or one you've built yourself), I can confirm that it made a world of difference for me.
2 Comments
7/5/2020 08:02:31 am
Hi, Natalie - Leave a Reply. |